It is surprisingly easy to build a dome yourself. However, there are some things you should be aware of.
Here is a guide to build a dome. First you can see a presentation via video, below I will go into the details of construction method:
Introduction to the construction:
The Dome is a 4-frequency dome. Here you can see the difference between the 4 most common dometypes. The higher the frequency number you choose the rounder it becomes, but the more complicated it becomes, too.
A dome is composed of a triangle which is repeated all the way around. Since a dome is a half-sphere, the bottom row of triangles are cut in half.
A 1-frequency (1V) dome consists of 10 triangles.
In a two-frequency dome (2V), the triangles are divided so that there are two triangles in the bottom of each large triangle (= two-frequency).
In a 3-frequency dome (3V), the triangles are divided so that there are three triangles in the bottom of each large triangle (= the frequency-3).
In a four-frequency dome (4V), the triangles are divided so that there are four triangles in the bottom of each large triangle (= four-frequency).

The challenge in making a dome is to create the right angle between the sticks forming a dome sphere. For that there is a calculation method. You can find a lot of calculators online, but most are in feet. If you need metric, you can use for example this: http://www.domerama.com/calculators.
Our dome is 5 meters in diameter and can be built with the following objectives:
Wood for construction:
For a 4-frequency dome you will need:
A: 63.2 cm with the angle at both ends of 82.7 degrees (30 pcs)
B: 73.8 cm with the angle at both ends of 81.5 degrees (30 pcs)
C: 73.6 cm with the angle at both ends of 81.5 degrees (60 pcs)
D: 78.2 cm with the angle at both ends of 80.7 degrees (70 pcs)
E: 81.2 cm with the angle at both ends of 81.4 degrees (30 pcs)
F: 74.6 cm with the angle at both ends of 81 degrees (30 pcs)
Remember to minus the diameter of your pipe. That means that these numbers should be 5,7 cm smaller in my dome because I use 2″ pipe.
You can build it in any kind of wood. But we have built our of Siberian larch. It is slightly more expensive than normal pine, but the natural oil content of larch, makes it a lot more resistant. However, you can not get Siberian larch in quite so many sizes, so we chose to buy terrace planks of 114 mm x 28 mm. we cut in half with a circular saw. Thus we got the 250 meters battens 57 x 28 mm that we needed for the construction.
What is important for the design is to cut the bars to an angle at both ends. It is terribly precise degrees as you can see, and you can of course not work as closely with the tree, but you can try :o). It must be the same angle at both ends.


Connectors:
The battens must be assembled in the ends. This can be done in many different ways. We decided to use a method which is very easy to work with and quite permissive for minor errors.
Each part is assembled with a metal tube of stainless steel. We chose to use a pipe of two-inch stainless steel.We cut the pipe with an angle grinder. Each link has the same thickness as the battens (57 mm) to fit when put together.
Joints are assembled with the perforated strips to be inserted through the tube and mounted on each side of the latches. My experience is that you have to cut the patent strips with two holes on each side of the latch. I saved a little money and made do with one screw, but it would have been a lot more precise and tight with two screws.
You will need the following parts:

6 five-way hubs

65 six-way hubs

20 four-way hubs – for the bottom of the dome
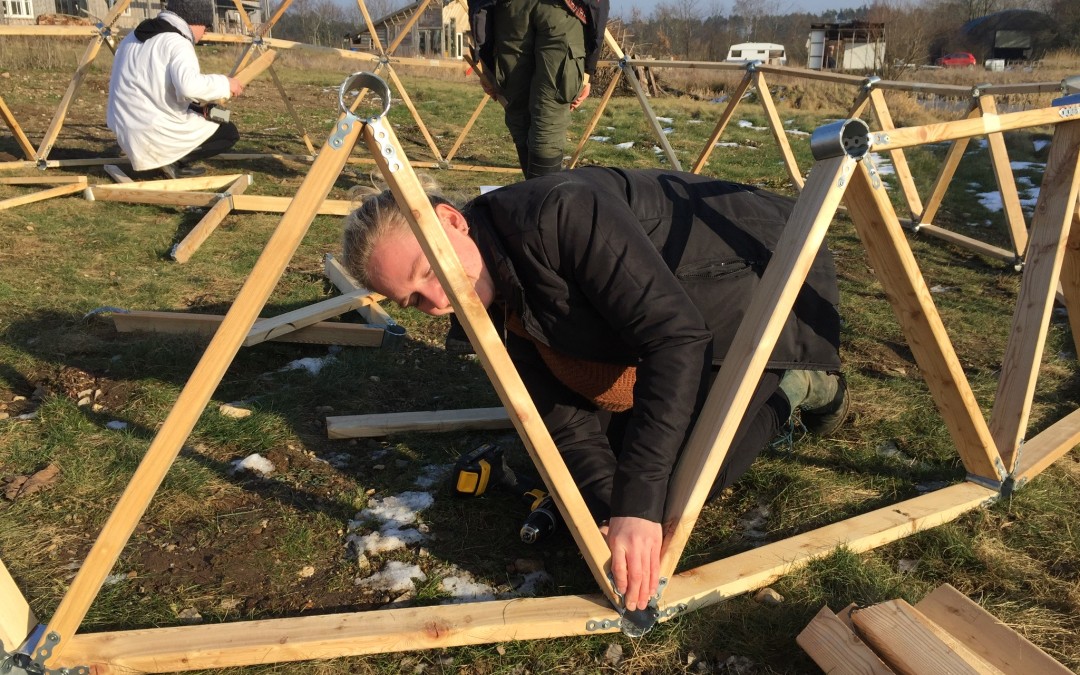
After you have cut the latches out and cut the tube and the patent strips, you are ready to assemble the dome.
It’s a good idea to start from the bottom and make all of the lower circle before working your way up. With a little efficiency, a dome as our can be assembled in a day.
When you screw patent the strips on, turn the second screw in a slight angle, so the patent strip will be tightening along the latch.
Do not be nervous when the construction is a little loose and hard to control. The more layers that come on, the more stable it becomes. A dome is an extremely strong construction, so once the last latches are attached, 4 men can easily sit on top!


Foundation
The foundation can be a little challenging.
We had decided to create a foundation of LECA blocks of 49x19x32 cm. This makes the dome 32 cm raised so that the center is 280 cm high.
We started to clear a space of about 5.5 meters in diameter and flattening it.
Then we put a pole in the middle and a string of 2.6 meters and a thin rod in the end. Now we could draw a line around the outer edge of the circle and coarse placing the stones.
Now you can shorten the string so that it is 250 cm long. Then each stone is placed so that the center of the stone hits the string width. Thus, the circle will be exactly 5 meters in diameter like the dome. (It must be said that the dome may well vary somewhat in size depending on how tight you tightened the patent strips).
The stones must now be placed neatly around side by side and leveled horizontally and vertically. I have not fixed the stones further, but considering, however, to make some spears on four locations that hold the stones.
When the dome was placed I turned frame screws in every stone through the dome bottom edge.

We chose to build flower boxes around the perimeter inside, to use the space where you can not stand up along the edge. We made them 50 cm in width, which means that I can stand up outside the boxes.
In the middle, we plan to put used stones or used terrace boards, because we want to use the dome as a dining area in cloudy weather.
Plastic
We chose to use UV-resistant plastic for the dome. You could also use glass or Plexiglas, but it will make the dome a lot more expensive. The plastic has been bought at www.jeepplastic.dk It is relatively expensive and became kr 1750 for our dome, but there is also plenty of plastic. Maybe you can get it cheaper at Ebay
We calculated that we would need 60 triangles of 75 x 75 cm and 110 pieces of 86×86 cm. Then there are 5 cm. for each side to pull in when the plastic is to be stretched. I cut two templates of wood and it was a good investment, as we then quickly could cut them out.
We chose to tighten the plastic from the top, as it makes it easier to climb the dome. But it means that you constantly have to leave the lower side hang up while the lower triangles are mounted so that water can flow from the top down without running into the plastic.
We clipped pieces firmly and put on wooden strips on top.
Here you can see a video where I show how the plastic is clipped on (sorry for the bad sound).


Wooden strips
Once the plastic is in place you need strips on the exterior. It is the most vulnerable part of the dome, but also the thing you see the first. One could imagine to make them from plastic, aluminum or wood. I chose to use the same latches from siberian larch, because of the increased durability of this type of wood. If I could afford it I would probably have bought boards in oak or similar hardwood, for I doubt indeed that these lists lasts as long as the rest of the dome, and it will be difficult to change them.
I think wood is the right solution because this is a very distinct part of the structure that comes to define the dome appearance.
I shot them with a nail gun, which can be recommended as there really be many nails to hold them in place.
One challenge in this construction is that the patent clips are placed and fills in each end so that the strips are easy to yawn.
Last finish
Our dome is almost finished, but not quite.
The main thing is that the pipes now stands open, so it rains … We expect to solve it by putting plugs in the pipes. You can stuff them with plastic plugs, which can be purchased in many sizes. But you can also make them yourself of ceramic, wood or aluminum. The challenge is that we have already set wooden strips just to the edge of the pipes. So unless we can find a plug that fits exactly in the pipe and possibly fugue it, the water will run between the lists and down the tube. And the collections with the wooden strips need to be hidden, it is the least elegant detail.
I update when we find a good solution.
The dome looks excellent and I sincerely think you all did a great job. Perhaps when cutting the plastic sheeting allow the plastic to continue past the hole, staple it to the connecting strut and then nail on the wood strips. The hole could be covered several times when overlapping the plastic sheeting and would allow for waterproofness. When I get a chance to build I am going to use your method. Thanks for the excellent tutorial and God bless you.
SOunds like a good idea! The plasticcoating is definitely a part that I would do better next time!
Hi,
Wonderfull work.
I am planning to make such a dome, i am living in Denmark, the tree would be not problem to find, but the plastic is something i could not find from market. I dont know if you can still remember where you bought the plastic?
regards.
Musa
Hi
I forgot to add the link in the english version. I have added it now – hope it helps you! Good luck with the dome!